| Taming the Mammoths On Developing the Big Negatives From Vol. 1 No. 2
By: Burkhard Kiegeland
Imagine yourself standing in total darkness preparing to place several sheets of 12x20" film into the prewash tray. It is a familiar procedure, maybe even routine, to process six sheets at a time as you’ve done many times in the past. But this time you lose concentration for a moment, or perhaps you become a bit over-confident. Half of the film is already sinking into the developer tray while you hold the remaining sheets fanned out and ready to develop. As you grab the next sheet with your free hand the film slips th This has happened to me twice - first a sheet of 12x20" disappeared, the second time, 2 years later it was a sheet of 20x24". Fortunately, I won both sheets back, but don’t ask me how long I was creeping around on all fours and groping in the darkness. My film processing room measures about 15x10 ft - in total darkness it becomes bigger and bigger. My first adventures in large format photography happened during the early 1970s when I bought a 4x5" Sinar-P for my studio. At that time I was working on two books, one about collecting After finishing the day’s work at my studio, in the back rooms of museums or in private collections, I used to deliver my box of exposed chromes to a professional film lab. The sheets of 4x5" black-and-white I processed in a JOBO drum. Although I knew about tray processing, it was not something I attempted during this period. Having only read about it in books, the process seemed old fashioned, slow and uncomfortable. This point of view changed rapidly when I put aside smaller format cameras and began doing serious work in large format. I began by using a Master Technika as well as an old 18x24cm wooden field camera. Not much later I added an old Korona 11x14" and a Folmer & Schwing 12x20" banquet format camera.
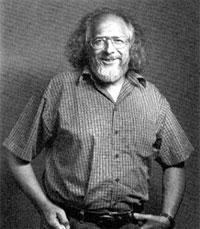
A Leap of Faith It is not necessary to put your hands in the chemistry. Make it a habit to wear rubber gloves throughout the process. This is especially important when developing in Pyro. Wearing gloves not only protects from staining and possible harmful health effects but also helps remove the psychological barrier mentioned before. Many people are concerned that wearing gloves can result in a loss of dexterity. With a little practice, however, the hands adapt to the difference in feeling and it becomes possible to do anything in the darkroom while gloved, even load holders. The last problem with tray pro For most film processing a set a three trays works very well. The number of trays and their size is dictated both by the largest negative to be processed and size of the workspace. The trays should not be much bigger than the size of the negatives. Trays that are too big cause scratches because the negatives can move around to much. • 10 sheets 8x10" in a tray size 8x10 need 3 liters of solution. • 6 sheets 12x20" in a tray size 16x20" need 5 liters of solution. • 6 sheets 20x24" in a tray size 20x24" need 8 liters of solution. Place the box containing your exposed film on a desk and grab the sheets one by one, allowing them to slide into the prewash tray. With your right hand, softly push the sheets under the water. Using this method you always have one dry hand and the prints don't stick together. Once all the sheets are in the prewash, begin shuffling according to the following description (This method should be followed throughout all the chemical steps): Second agitation cycle: Same as first cycle but pull the sheets from the far end of the tray. Third agitation cycle: Same as above but pull the sheet from the left. Most important: Never drag the The first inspection should be made about halfway through the development cycle. A second and third inspection can be made one to two minutes after the first, depending on the status of the negative. By using the green light only briefly it is possible to examine the status of development without fogging the film. Although film is sensitive to green light, the human eye is so sensitive When starting out with the inspection method it is best to develop by timing the development. As you inspect the film during development you will begin to develop a feel for what the film should look like under the green light at different stages of development. Over a period of time you will be able to tailor the development by judging whether the film should be left in the tray for the entire recommended time or placed in the stop tray earlier. After development is finished, the sheets are placed back into the prewash tray. At this point you should have water flowing through the prewash tray. The flow rate should be high enough to keep the tray filled, which will also allow the water to act as a developer stop, removing the need for an acid stop bath. Once all the Continue shuffling the negatives using the left, front right pattern described for developer agitation. After about 3 minutes in the fixer you can turn on the white lights. If you are developing in PMK pyro you should place the negatives back into the used developer after fixing and agitate for about 2 minutes. This helps to reduce staining. Finally, the negatives go back into the middle tray for washing. Shuffling through the pile continuously while making about 10 changes of the wash water will remove residual hypo. Processing the big negatives may seem daunting at first, but after you have processed a few batches of 20x24" film you will find that 12x20" become easy to handle and 8x10" seems like a postage stamp! Burk Kiegeland has been a writer, fine art photographer and printer in Germany for 40 Years. He has written two bestselling instruction books on photography and the darkroom that have been translated in to several European languages. He is a regular contributor to the German magazine SchwarzWeiss(Monochrome, literally translates as "Black/White") on film processing, fine printing and the non-silver processes. He is chairman and technical director of Lotus View Camera. The Lotus view camera was designed by based on his practical experence working in the field. |


